
Buy Tramadol 100 Mg Online I recently asked for some ideas of what people want to learn how to style in WordPress. My friend Drew DuBoff mentioned the Pro Tip box from Penny Hoarder.
https://dentalprovidence.com/crowding/ Mine’s not an exact match, but it’ll do the trick.
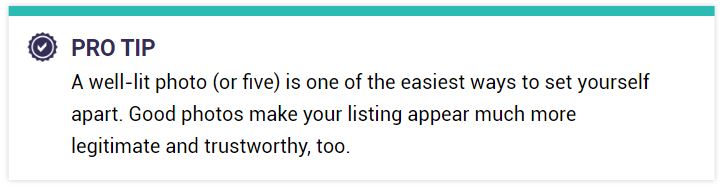
Let’s Test This Pro Tip Box
Strange women lying in ponds distributing swords is no basis for a system of government. Supreme executive power derives from a mandate from the masses, not from some farcical aquatic ceremony.
Buy Ultram Online You can create this box with a bit of code.
Step 1. Copy this code, and paste it into the CSS box in Divi Theme Options.
Ambien 10 Mg Price (Note: If you’re not using Divi, paste this into wherever your custom CSS option is in whatever theme you’re using.)
https://ramedicare.com/wholesale/ .pro-tip {
padding: 12px 10px 12px 44px;
max-width: 800px;
width: 100%;
background-color: #FFFFFF;
box-shadow: 0 0 5px 0 rgba(0,0,0,0.4);
border-top: 10px solid #e7a83b;
margin: 32px auto;
}
Buy Alprazolam No Prescription .pro-tip > h4 {
margin: 0 0 2px 0;
text-transform: uppercase;
position: relative;
}
.pro-tip > h4:before {
display: block;
width: 32px;
height: 32px;
background-image: url(‘http://designerless.dev/wp-content/uploads/2019/10/32-checkmark.png’);
position: absolute;
background-size: 32px 32px;
top: 1px;
left: -39px;
right: 50px;
content: ”;
}
https://www.randwickpsychologycentre.com/contact/ .pro-tip > p {
margin: 0;
font-size: 16px;
line-height: 21px;
color: #000;
}
@media (min-width: 600px) {
.pro-tip {
padding: 14px 60px;
}
Buy Carisoprodol Online .pro-tip > h4:before {
width: 32px;
height: 32px;
background-size: 32px 32px;
}
https://www.andrewplimmer.com/business-tools-and-resources/ .pro-tip-box > p {
line-height: 30px;
}
}
Step 2. Style Your Pro Tip
Ambien Buy Online To use your Pro Tip Box in blog posts, go into the text editor, and paste this code:
https://blackhillsballoons.com/local-recommendations/ <div class=”pro-tip”>
<h4>Your Headline Here</h4>
Your Text Here
</div>
http://www.amandasatoz.com/?page_id=1454 H4 matters because the checkmark icon is tied to that class. The code will pull in the checkmark next to anything with that H4 inside that div class. You could ostensibly have a whole ton of checkmarks if you keep using H4.
Checkmark
Checkmark
Checkmark
Checkmarks all the way down
You can use a series of H4s inside that div class to create a list that stands out from the rest of your post. But note that this is not a list class. It’s merely a set of H4 tags that pull in the checkmark icon.
Order Pregabalin Online You can use H3 or 5 or whatever sub-H you want, but it won’t pull in the checkmark if you don’t change it in the CSS above.
If you do not close the div, you’ll break your site’s code, so make sure you keep that closing div tag in. (The </div> tag)
How to Customize The Box
http://www.amandasatoz.com/?page_id=1741 In the first bit of code, you can alter the padding, shadow, margin, background colour, and top border colour.
.pro-tip {
padding: 12px 10px 12px 44px;
max-width: 800px;
width: 100%;
background-color: #FFFFFF;
box-shadow: 0 0 5px 0 rgba(0,0,0,0.4);
https://castlehomecomfort.com/toilet-repair/ border-top: 10px solid #e7a83b; (REPLACE THIS HEX CODE WITH YOUR OWN COLOUR)
margin: 32px auto;
}
https://rgprincipal.com/contact-colombia/ To change the icon go to this bit of code and change the background image URL.
.pro-tip > h4:before {
display: block;
width: 32px;
height: 32px;
Buy Prednisone Online Without Prescription background-image: url(‘http://designerless.dev/wp-content/uploads/2019/10/32-checkmark.png’); (REPLACE THIS WITH YOUR ICON IMAGE. Make sure it’s sized to 32px square or it will break the design)
position: absolute;
background-size: 32px 32px;
top: 1px;
left: -39px;
right: 50px;
content: ”;
}
Just seeing this now! Was about to tag you on FB because I was looking for this 🙂